Next: DISCUSSIONS AND FUTURE PLANS
Up: Ji: Controlled illumination
Previous: Target-oriented wavefront synthesis
The various wave stack approaches,
which were explained in the previous section,
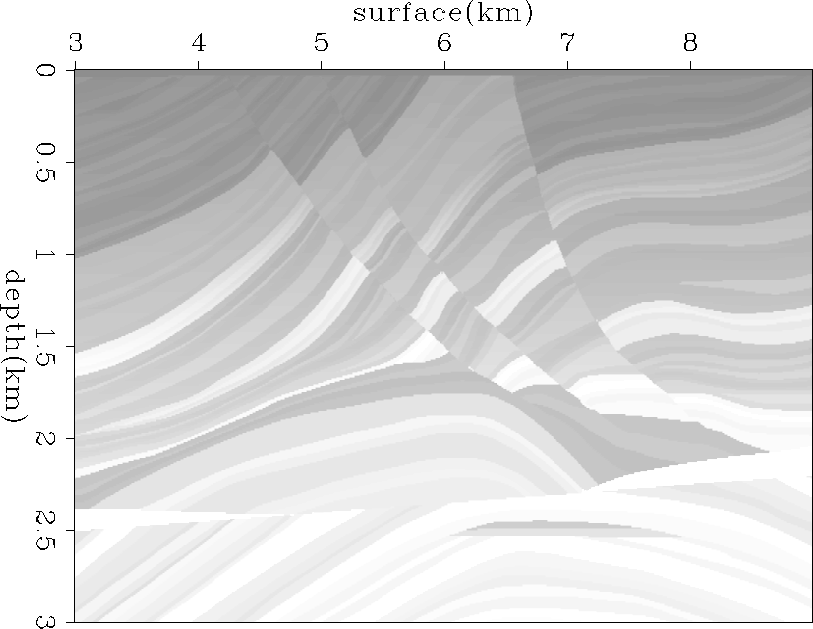
are tested using the well-known Marmousi dataset
(Figure 1).
Most of the wave stack approaches use a profile imaging
method as the imaging tool.
The profile imaging requires
that every trace after wave stack
have the information from all shots.
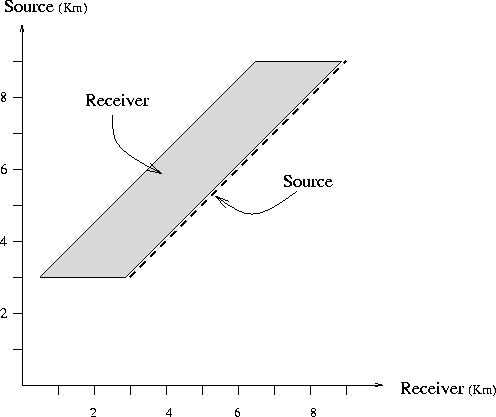
This means that the ideal acquisition pattern should
be a fixed spread acquisition (Figure 2).
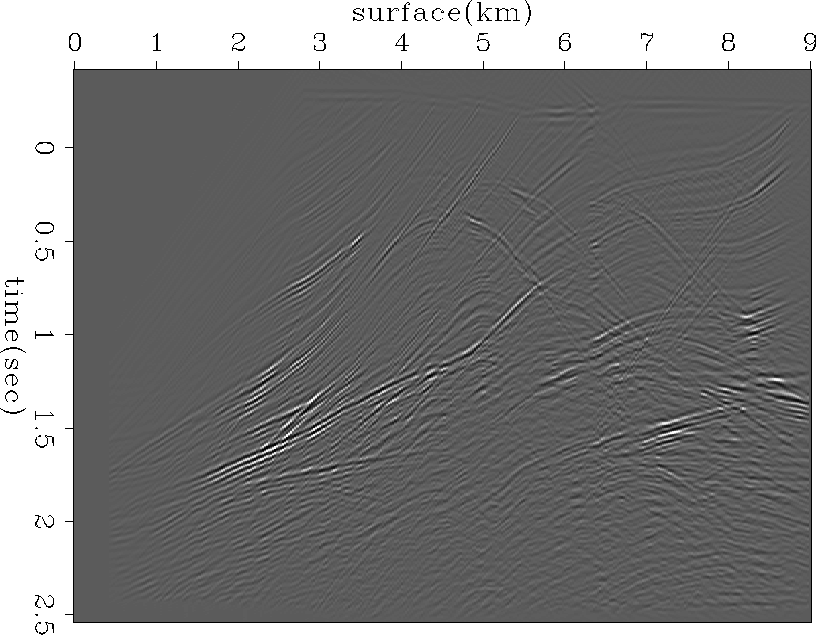
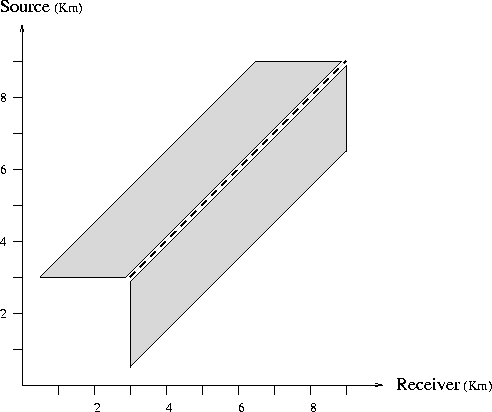
The Marmousi data set, however,
used moving marine spread acquisition (Figure 3).
This reality of the acquisition will result
in some ghost images.
One quick way to increase the coverage of the source
for each trace in the stacked section is
to use the reciprocity property.
Figure 4 shows the coverage after applying reciprocity.
marmvelwin
Figure 1 The Marmousi velocity model, cf. Versteeg and Grau(1991).

idealgeom
Figure 2 A fixed spread acquisition. The acquisition of this type is ideal for
the controlled illumination because each trace after wave stack
will have the responses from all shots.
|
|  |
marmgeom
Figure 3 The marine spread acquisition of the Marmousi data set.
|
|  |
marmrecp
Figure 4 The Marmousi data set coverage after applying the reciprocity
property of the source and receiver.
|
|  |
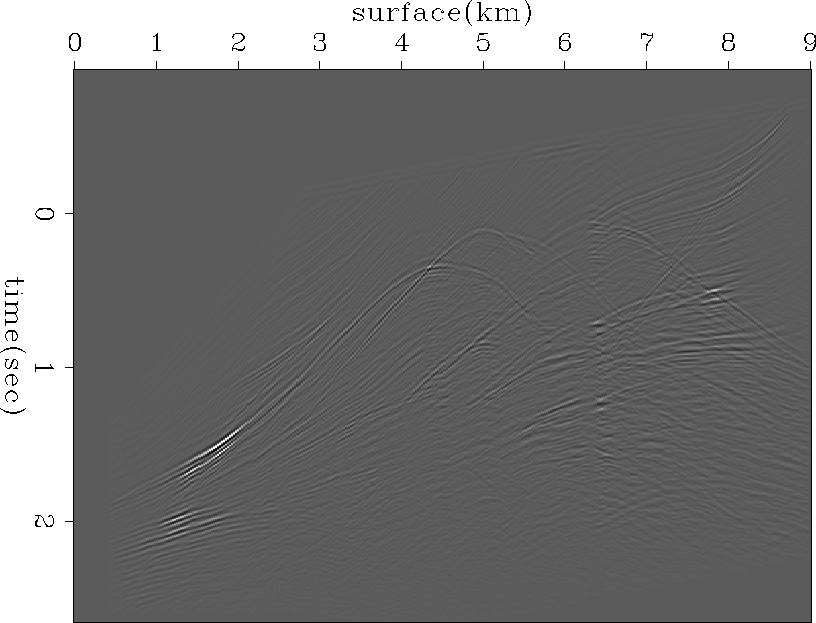
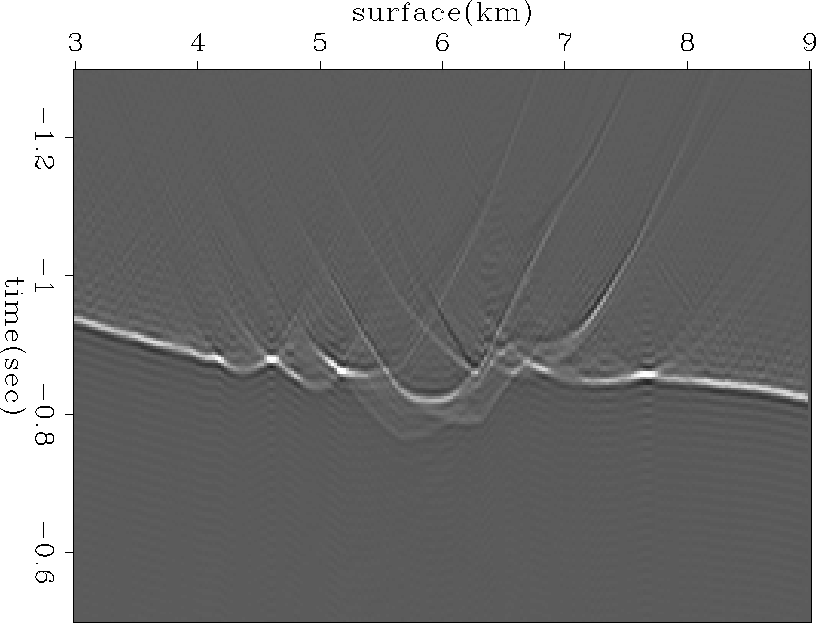
The result of the synthesis for a plane wave at the surface
is shown in Figure 5.
This synthesis is obtained by stacking along the common geophone gathers.
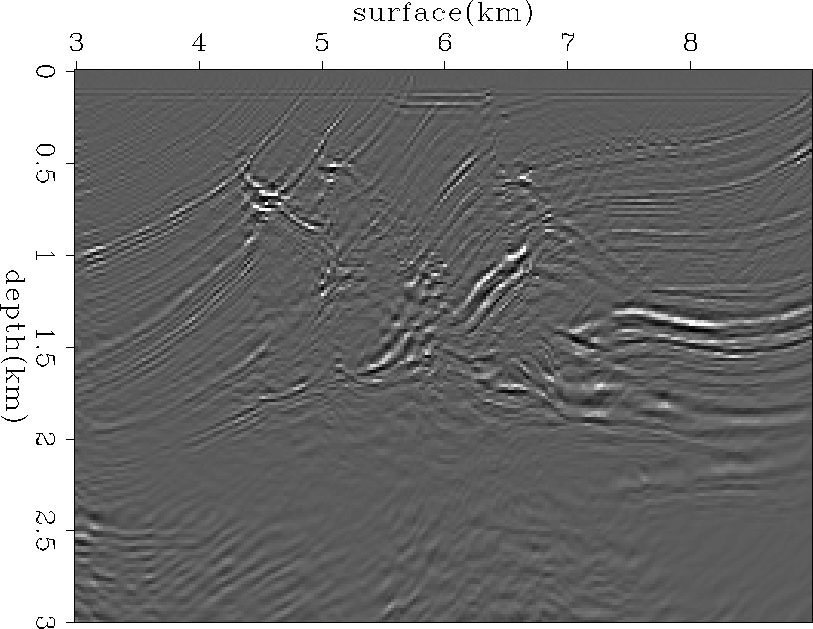
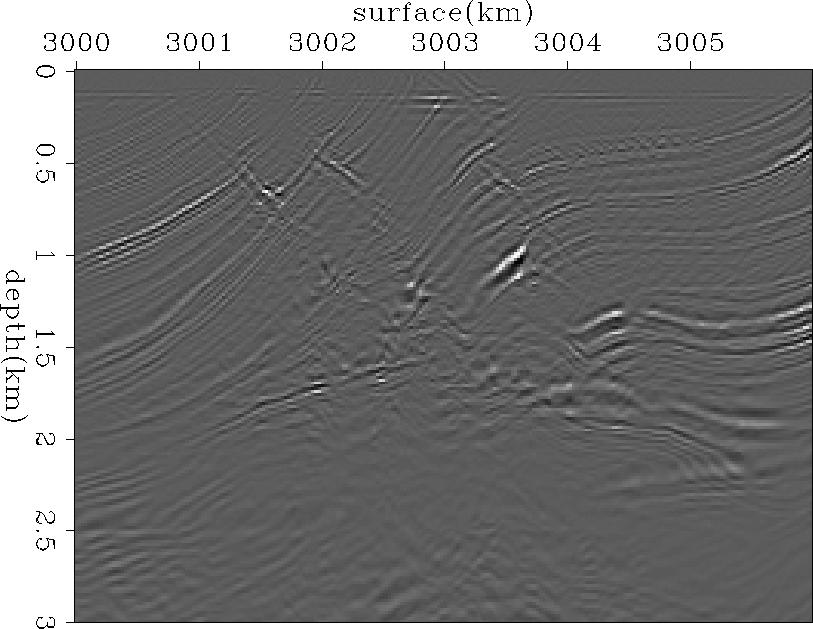
Figure 6 shows the migrated image
with the true velocity model (Figure 1).
For extrapolation of both upcoming and downgoing wave,
I used the split-step Fourier method (Stoffa at al., 1990).
The images are generally located at the correct
place, but show large amplitude variation
along the same reflector.
This effect are due to the distortion of the wavefront
and the complex shape of the reflectors.
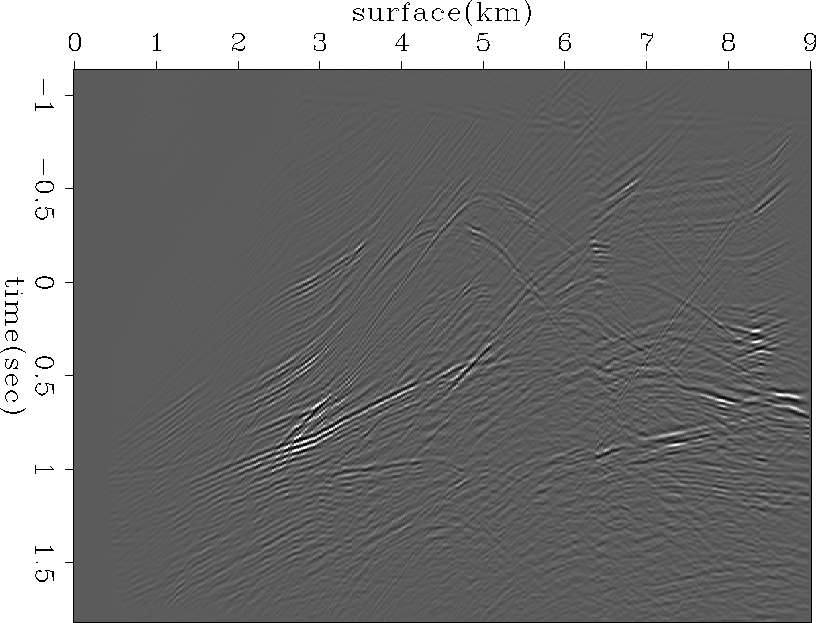
stackp1
Figure 5 Stacked section by simulating a plane wave at the surface.


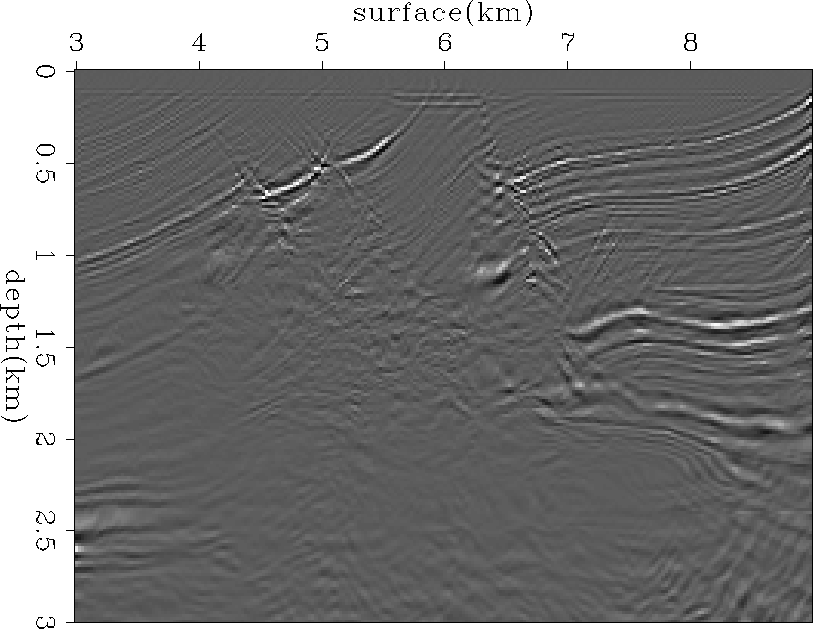
 conillp1
Figure 6 Migrated image of Figure 5.
The result of the synthesis for a slanted plane wave at the surface
is shown in Figure 8.
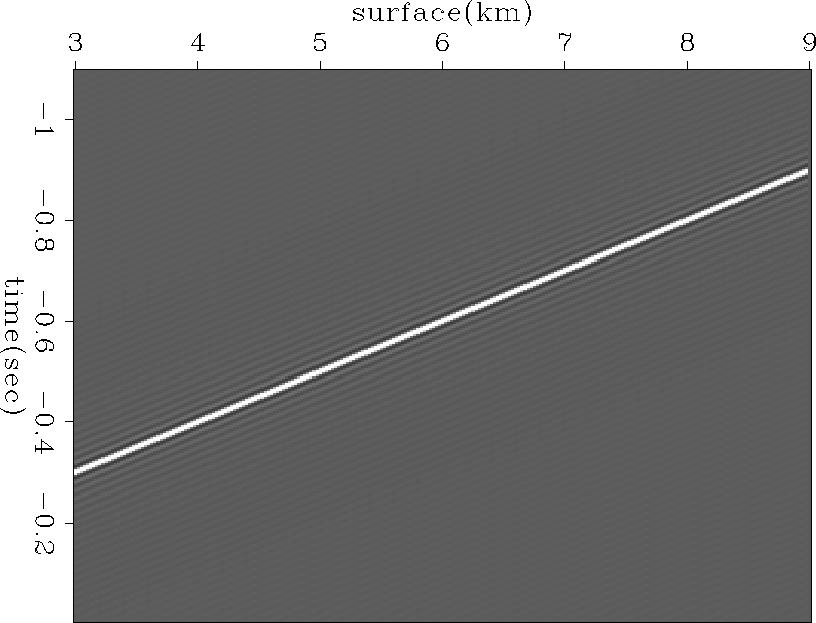
For this synthesis, each shot was delayed from left to right
with p = .1 (sec/km) and the delay operator
is shown in Figure 7.
In the Figure 9, which is the migrated image
of Figure 8, shows the stronger amplitude
along the dips that are approximately parallel to the wavefront.
srcfldsp1-1
Figure 7 Synthesis operator for simulating slant plane wave:
Each shot gather is delayed with p = .1 (sec/km) at the surface
before wave stack along the common geophone gathers.
stacksp1-1
Figure 8 Stacked section by simulating a slanted plane wave (p=.1(sec/km))
at the surface.
conillsp1-1
Figure 9 Migrated image of Figure 8.
Another slanted plane wave is synthesized with
opposite direction at the surface.
For this synthesis, the delay operator,
p = -.1 (sec/km), are applied to each shot gathers and
are shown in Figure 10.
The result of wave stack is shown in Figure 11.
Figure ![[*]](http://sepwww.stanford.edu/latex2html/cross_ref_motif.gif) shows the migrated image
with the true velocity model (Figure 1).
shows the migrated image
with the true velocity model (Figure 1).
srcfldns1-1
Figure 10 Synthesis operator for simulating slant plane wave:
Each shot gather is delayed with p = -.1 (sec/km) at the surface
before wave stack along the common geophone gathers.
stackns1-1
Figure 11 Stacked section by simulating a slanted plane wave (p=-.1(sec/km))
at the surface.
conillns1-1
Figure 12 Migrated image of Figure 11.
For synthesizing a plane wave at 800 meters
depth level, the synthesis operator is generated
by equation (5) and shown in Figure 13.
Figure 14 shows the wave stack
by use of the synthesis operator Figure 13.
Figure 15 shows the result of migration.
Figure 17 shows the result of migration
using the same procedures as the Figure 15 for
a plane wave at depth level 2800 meter.
We can see that the reflector at deep level start to appear as
the level of plane wave synthesis goes down.
Figure 18 is a result of summation
of several images, plane wave synthesis at 0, 2000, 2800 meters and
slanted plane wave synthesis at 800 meters.
srcfldp50
Figure 13 Synthesis operator for simulating plane wave at 800 meters.
stackp50
Figure 14 Wave stack section by simulating
a plane wave at depth level 800 meter.
conillp50
Figure 15 Migrated image of Figure 14.
stackp175
Figure 16 Wave stack section by simulating
a plane wave at depth level 2800 meter.
conillp175
Figure 17 Migrated image of Figure 16.
conillpsum
Figure 18 Migrated image using controlled illumination
by simulating several plane waves at different depth levels:
plane waves at 0, 2000, and 2800 meters,
and two slanted plane waves at 800 meters.
Next: DISCUSSIONS AND FUTURE PLANS
Up: Ji: Controlled illumination
Previous: Target-oriented wavefront synthesis
Stanford Exploration Project
11/16/1997