


Using the elevation map of the San Francisco Bay area illustrated in
Figure ![[*]](http://sepwww.stanford.edu/latex2html/cross_ref_motif.gif) , a second test was conducted to assess the
applicability of the method in 3D. The maximum surface topographic
relief is approximately 800 m; however, the elevation gradients and
topographic wavelengths are significantly smaller and longer than the 2D
test illustrated in Figure . The flat
subsurface datum is set a depth of 8000 m.
, a second test was conducted to assess the
applicability of the method in 3D. The maximum surface topographic
relief is approximately 800 m; however, the elevation gradients and
topographic wavelengths are significantly smaller and longer than the 2D
test illustrated in Figure . The flat
subsurface datum is set a depth of 8000 m.
|
Bay.2D
Figure 4 Elevation map of the San Francisco Bay area used in 3D testing. | 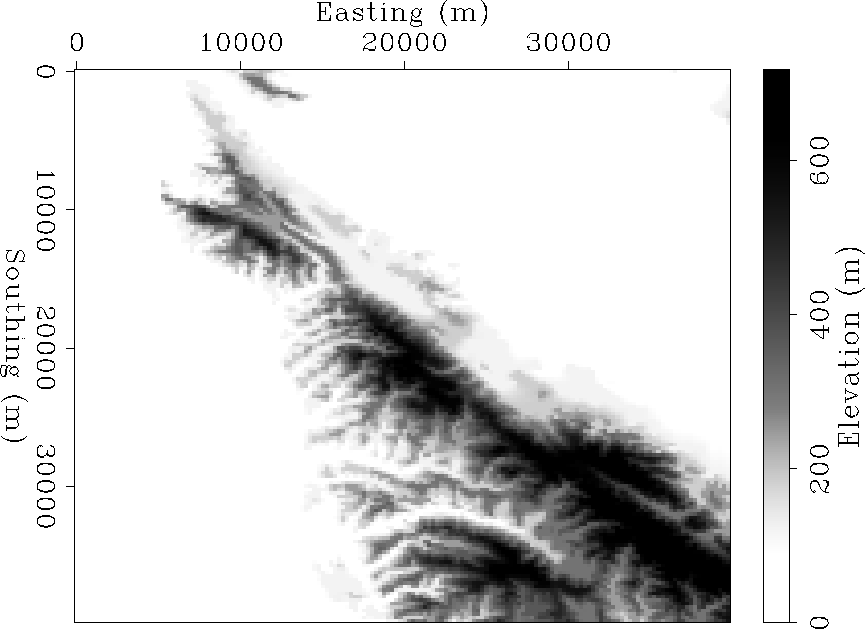 |


Figure presents the slices through the 3D potential
function results. The top panel shows a depth slice at approximately
zero elevation, whereas the lower two panels show slices along Easting
(bottom left) and Southing (bottom right) directions.
 |
These profiles illustrate a PF that is smoother than the previous example.
Figure shows the coordinate system generated along
the same two slices shown in the panels b) and c) of
 |
Figure . The generated coordinate system much smoother
than in the previous example, as expected from the smoothness of the
PF. Figure presents a perspective view of the ray-traced
coordinate system results.
 |
.
The coordinate system rays are fairly straight, except in the region
beneath topographic highs. Another way to visualize the ray
coordinate system is to examine how the topography 'heals itself' at
various ![]() steps. Figure illustrates this for
the
steps. Figure illustrates this for
the ![]() (top left),
(top left), ![]() (top right),
(top right), ![]() (bottom left) and
(bottom left) and ![]() (bottom right) surfaces, where N is the
total number of extrapolation steps.
(bottom right) surfaces, where N is the
total number of extrapolation steps.
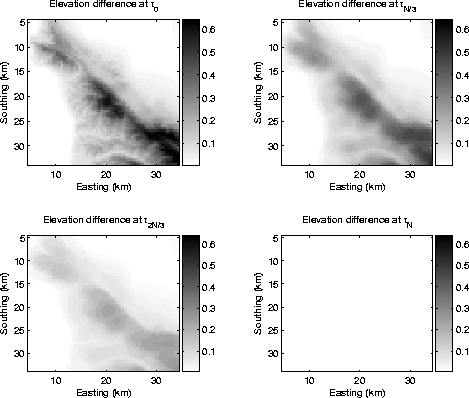 |
The sidebars show the elevation difference between the
lowest and highest points of each equipotential surface. The
greyscale intensity has been clipped according to the maximum
elevation difference at ![]() .
.