Next: Regularization
Up: Madhav Vyas: Covariance based
Previous: Interpolation beyond aliasing
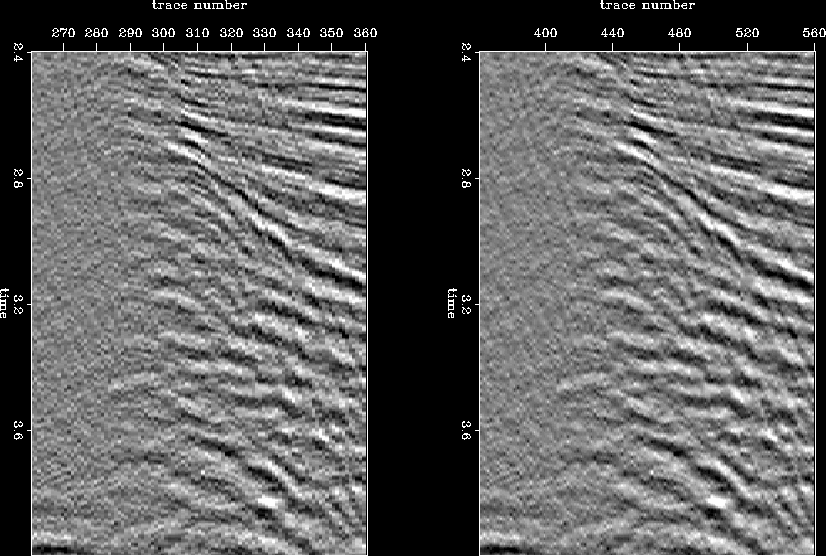
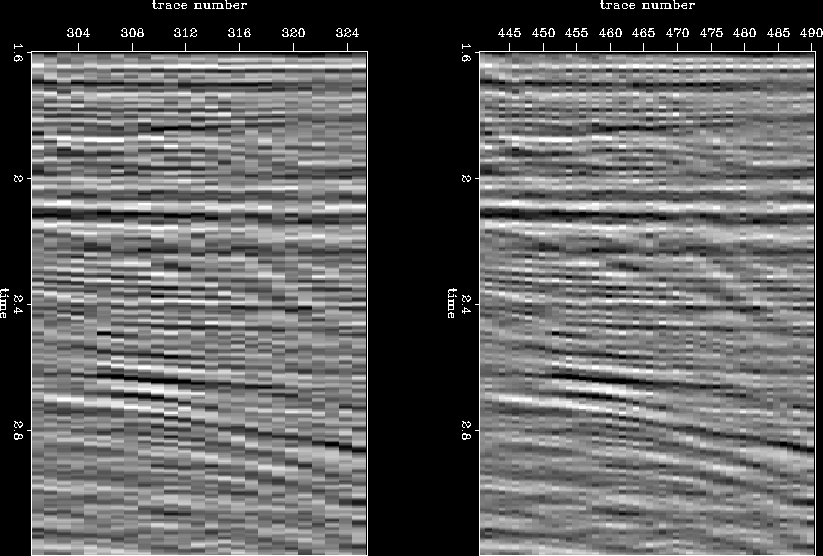
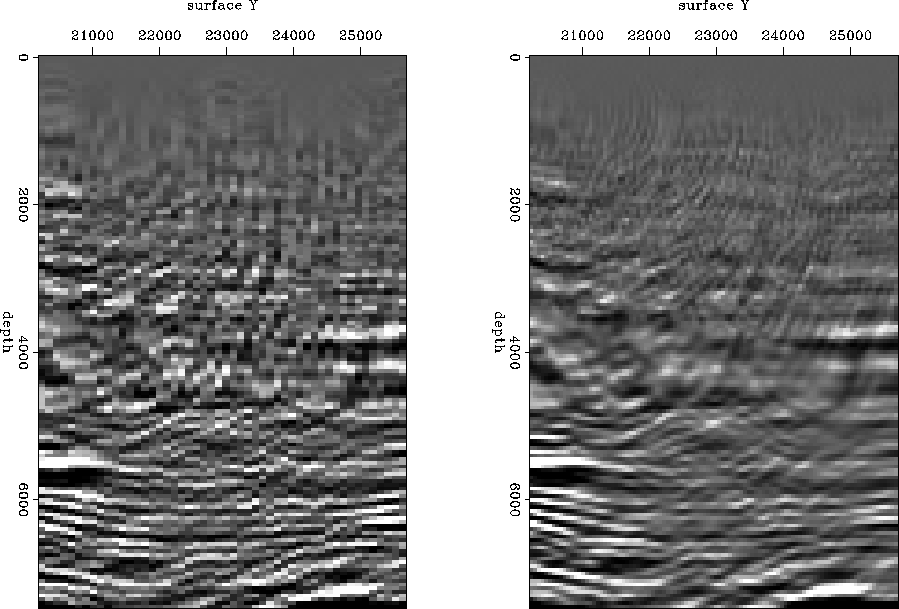
Finally, I test the proposed method on a real 3D DMO stacked data set acquired by UNOCAL in Gulf of Mexico. The first step is to look at a few 2D lines from within the 3D data cube. The sampling interval along both inline and crossline directions is 110 ft. Since our final goal is to achieve a high-resolution image, I infill the inline section with zero traces and then interpolate. A window from one inline section before and after interpolation is given in Figure ![[*]](http://sepwww.stanford.edu/latex2html/cross_ref_motif.gif) . In general, the result looks good and is of a higher resolution. But, in another window at a finer scale taken from same line (Figure ), we observe a discrepancy between the interpolated and the observed amplitude (a blocky pattern). This happens primarily because in real situations things are not perfect; we record noise as well as signal, and the strength of the signal is not uniform everywhere. As a result, our estimate of covariance includes characteristics of both signal and noise. Therefore, some sort of regularization or model styling would be desirable while interpolating, to ensure a certain degree of smoothness in the final image.
. In general, the result looks good and is of a higher resolution. But, in another window at a finer scale taken from same line (Figure ), we observe a discrepancy between the interpolated and the observed amplitude (a blocky pattern). This happens primarily because in real situations things are not perfect; we record noise as well as signal, and the strength of the signal is not uniform everywhere. As a result, our estimate of covariance includes characteristics of both signal and noise. Therefore, some sort of regularization or model styling would be desirable while interpolating, to ensure a certain degree of smoothness in the final image.
The implementation of the proposed interpolation filter in 3D is similar to that in 2D, the only difference being that in 2D we considered four diagonal neighbors situated at corners of a square for interpolation, whereas in 3D we consider 8 diagonal neighbors situated at corners of a cube. Fortunately, this data required no anti-aliasing technique, and the results shown were achieved with the method in its original form.
As part of interpolation, I re-sample both the inline and crossline axis by half. Interpolation was carried out first in the inline direction and then in the crossline direction. This approach is equivalent to estimating both at once; infact they are computationally different but conceptually the same. Since we are interpolating along both inline and crossline directions, depth (time) slices will be the best places to look for the differences. In Figure , I compare the time slices before and after interpolation taken at 3 seconds. Similarly a comparison between slices taken at 4 seconds is drawn in Figure . Apart from resolution enhancement in the interpolated time slice, we also notice some patching artifacts (linear, grid-like features). Patching was introduced to maintain the assumption of local stationarity before applying the algorithm to larger dimensions. The artifacts creep in, because when we have an unknown trace at the end of a patch, we do not have non-zero diagonal neighbors on both the sides, so we need to make an approximation about the boundary. For this example I assumed Zero-Slope Boundary Conditions.
win1
Figure 16 Window from an inline section; panels show original (left) and interpolated (right) data.
win2
Figure 17 Window from an inline section before (left) and after (right) resolution enhancement demonstrating blocky pattern in the result.
slice1f
Figure 18 Time slice taken at 3 seconds (a) before interpolation and (b) after interpolation.


 slice2f
Figure 19 Time slice taken at 4 seconds (a) before interpolation and (b) after interpolation.
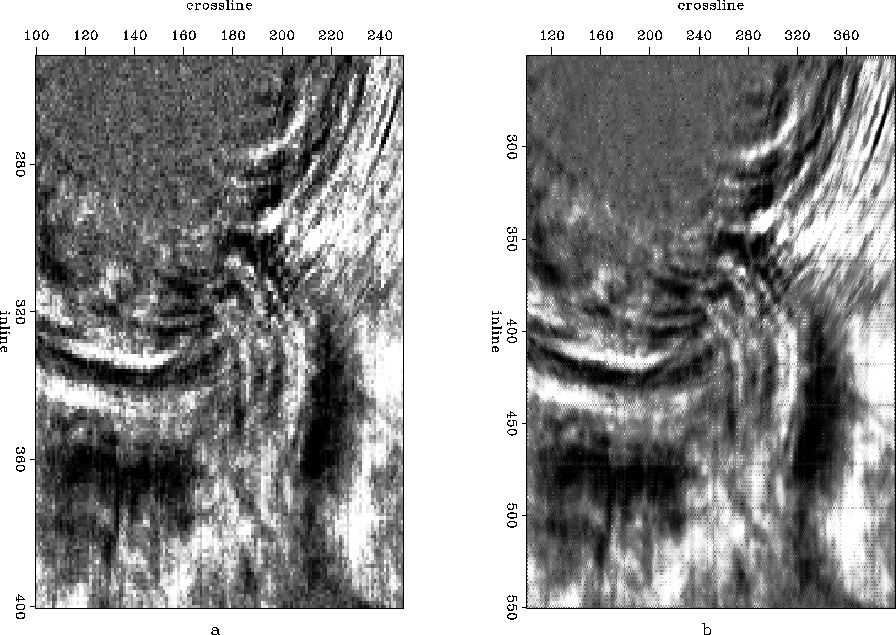
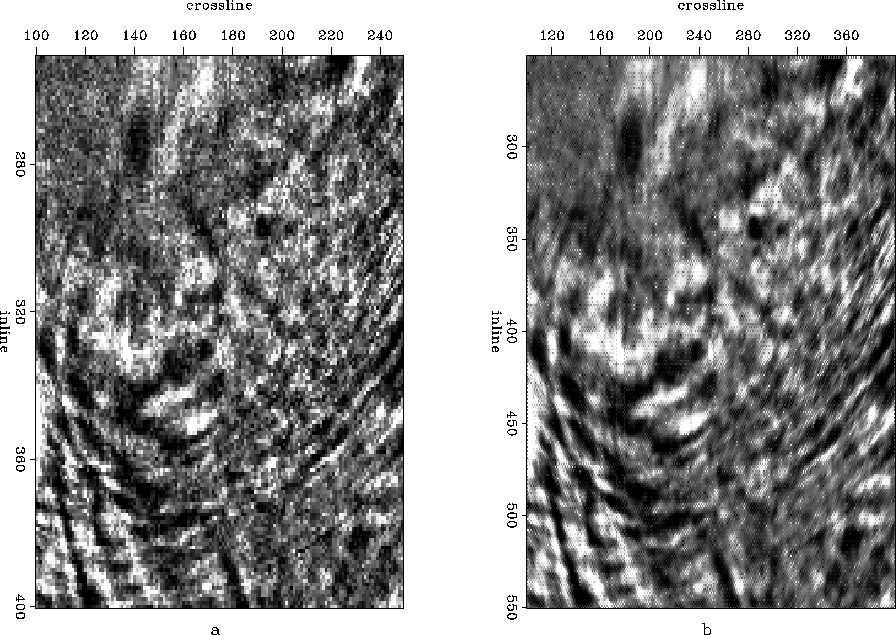
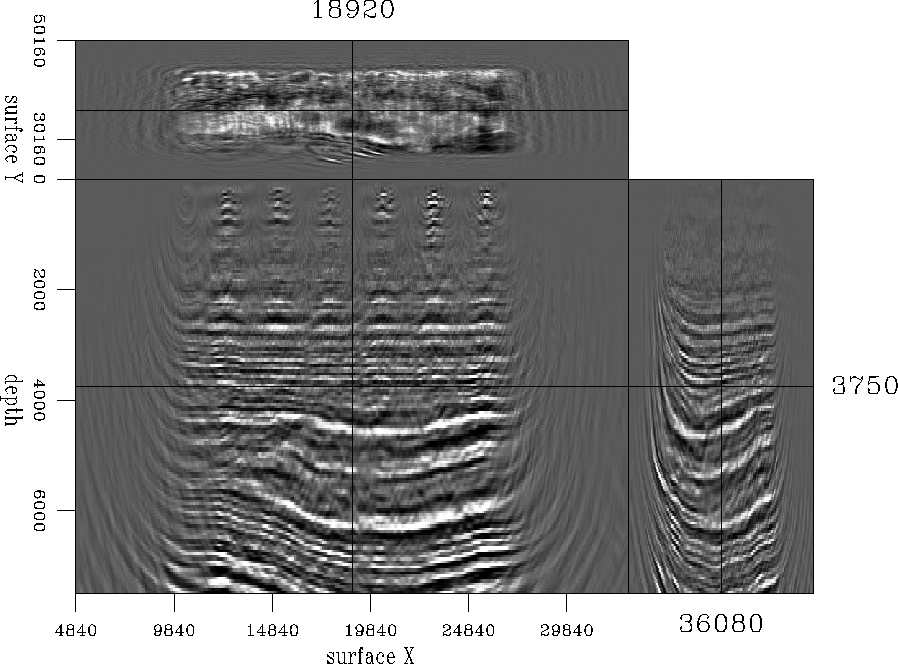
The main reason for increasing the resolution of this data set was to see whether we could improve the migration results. Figure shows a cubeplot taken at the center of the migrated cube before interpolation, and Figure shows migrated results at same location. In the latter case, migration was carried out after interpolation. The migrated results created after interpolation look marginally better than the ones created without. The difference is a little more pronounced when we window a small portion and look closely, as displayed in Figure . On one hand there is an obvious enhancement in the resolution but on the other, there is a substantial increase in the computational costs, since the data volume after interpolation was four times larger.
3face
Figure 20 Cubeplot taken at the center of the migrated cube before interpolation.
interp.3face
Figure 21 Cubeplot taken at the center of the migrated cube after interpolation.
Finally let us compare a depth slice taken from the image cube at 6000 ft, with migration carried out before (Figure (a)) and after interpolation (Figure (b)). Results obtained by migration after interpolation look particularly better inside the salt structure and on top right corner where some channels come out more clearly.
We can conclude that the proposed covariance-based interpolation scheme worked reasonably well for the 3D data set under considertaion. The algorithm in its present form can handle slight aliasing, but it would be interesting to experiment with severly aliased data sets.
migwin
Figure 22 Window from within the migrated result, (a) without interpolation and (b) with interpolation.
migslicef
Figure 23 Depth slice taken at 6000 ft from migrated cube (a) without interpolation and (b) with interpolation.
Next: Regularization
Up: Madhav Vyas: Covariance based
Previous: Interpolation beyond aliasing
Stanford Exploration Project
1/16/2007