


Often it is
useful and spectacular
to plot a Wiggle plot on top of a raster plot.
That is a little tricky, but not too hard.
First make our windowed input data again (if we don't still have it):
Window < Txx.H min1=.4 max1=.8 max2=1. > Txx_Windowed.H
Now run Ta2vplot once to make the ``background'' raster plot:
Byte < Txx_Windowed.H pclip=100 | \
 Ta2vplot par=plotpar min1=.4 max1=.8 max2=1. min2=.05 \
 out=file1.v head=/dev/null
(For this example we won't need the history file with its parameters any more, just the data file containing vplot graphics commands. The
out=file1.v tells Ta2vplot to write
the output to ``file1.v''; the head=/dev/null throws the
output history file away to the UNIX garbage-can device ``/dev/null''.)
Finally we run Wiggle twice,
once with thick ``invisible'' traces and
once with half as thick standard yellow ones:
Wiggle < Txx_Windowed.H par=plotpar min1=.4 max1=.8 max2=1. min2=.05 \
 poly=no out=file2.v head=/dev/null plotcol=0 plotfat=10
Wiggle < Txx_Windowed.H par=plotpar min1=.4 max1=.8 max2=1. min2=.05 \
 poly=no out=file3.v head=/dev/null plotfat=5
Note how we had to specify all four limits to be sure
that the plots produced by the very different plotting programs
Ta2vplot and Wiggle would be compatible.
(For some other plot programs even this isn't enough; we also have to
turn off the ``padding'' between plot and axes.)
Now for the ``advanced graphics'':
to combine the three plots, we use a special pen filter called
``vppen'',
which reads in and writes out the vplot graphical files used by
SEPlib programs.
vppen file1.v file2.v file3.v erase=once vpstyle=no | tube
vppen is not itself a SEPlib program,
hence the lower-case initial letter and why we had to use out=
above. (There is a SEPlib version called Vppen that we could
have used, but history files become less useful at this point.)
Note that we didn't really need to use vppen above;
we could have just done
tube file1.v file2.v file3.v erase=oncedirectly. It is useful to do such manipulations with
vppen because
it lets us save the composite plot as a single vplot file,
in effect ``flattening'' the composite into a single plot.
There is no magic involved here;
vppen is a vplot pen filter just like tube, and shares
almost all the same code.
The only difference is that while tube draws plots
on screens, vppen writes out ``vplot graphical language''.
Suppose you plot something on your screen using tube with
complex options and multiple input files, and want to somehow save your
graphical masterpiece in such a way that you can reproduce it again later
without so much trouble with options and files.
Simple: just replace tube with vppen and redirect the output.
You have now saved your masterpiece as a single vplot file.
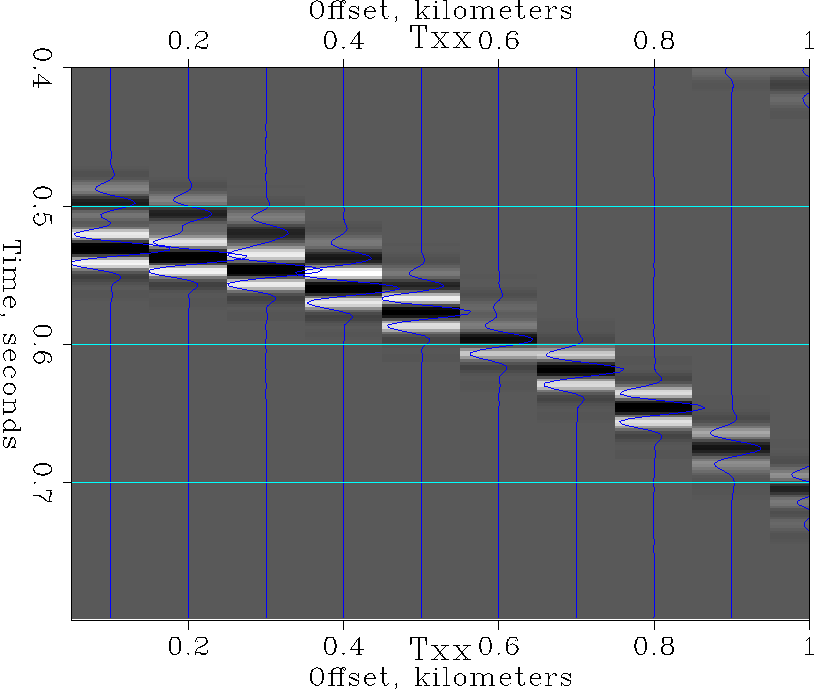
If you are looking at our example plot on your screen right now
you might be wondering why we went to
the trouble of creating the ``invisible wiggles'' file file2.v.
We hope that after you examine the hardcopy
version in Figure ![[*]](http://sepwww.stanford.edu/latex2html/cross_ref_motif.gif) the reason should become evident!
the reason should become evident!
 |
vppen file1.v file2.v file3.v erase=once vpstyle=no | pspen

Examining Figure you may also notice there are
two titles. While various plot programs like Wiggle
and Ta2vplot are consistent in their options for things like
where to put the title, which way to put axes, etc, for historical reasons
they are not consistent in their defaults. So if you want to
get plots from different programs to exactly overlay in general you
have to specify everything. Since we did not specify whether to put the
title above or below the plot, we got the (different) default for each.
You shouldn't have trouble getting around such annoyances. (Usually you
just turn off the axes and labels for all the parts but one.)